Report Configurations
Table of Contents
- Create a New Report Configuration
- Update a Report Configuration
- Schedule a Report Configuration
- View a Report Configuration's Schedule
- Update a Report Configuration's Schedule
- Pause a Report Configuration's Schedule
Report configurations are the new version of "Saved Reports", a system that allows you to set up a report with resource filters, date ranges, and more. A report configuration can be scheduled to be sent via email to help keep your team and partners up to date.
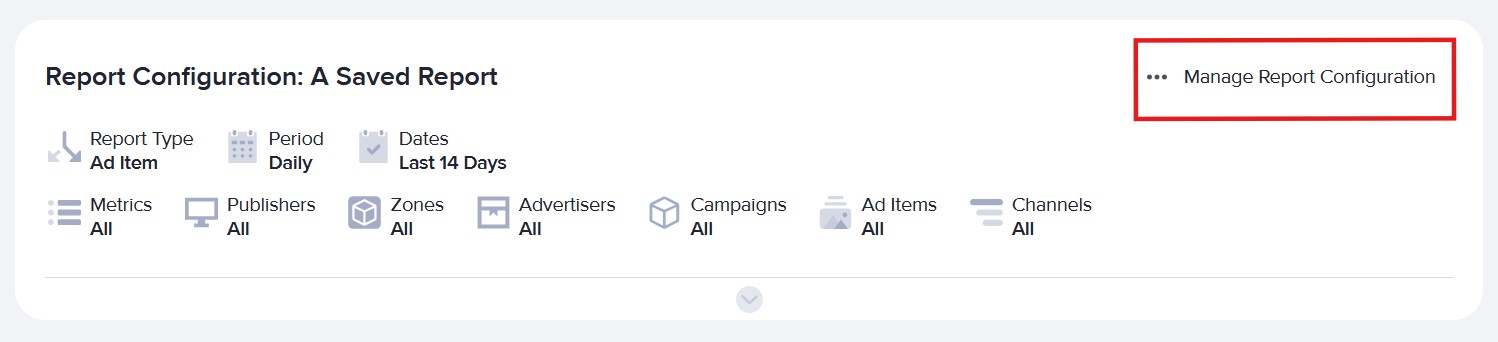
The report configurations can be found under Statistics > Statistics Reports.
Create a New Report Configuration
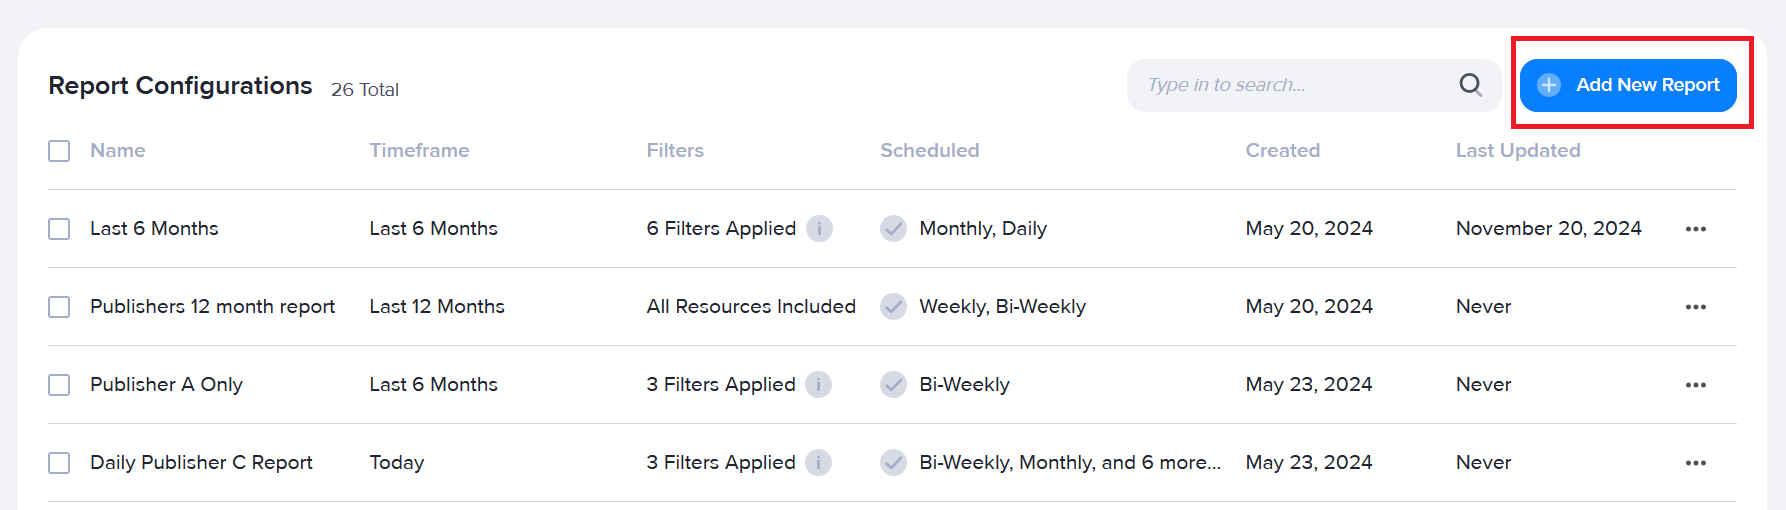
- In the Display Report Configurations page, click on Add New Report. This will take you to the report page with no pre-loaded filters.
- Set up your report by selecting data, selecting dates, then filtering your data.
- Once you are happy with the set up you can click Save Configuration.
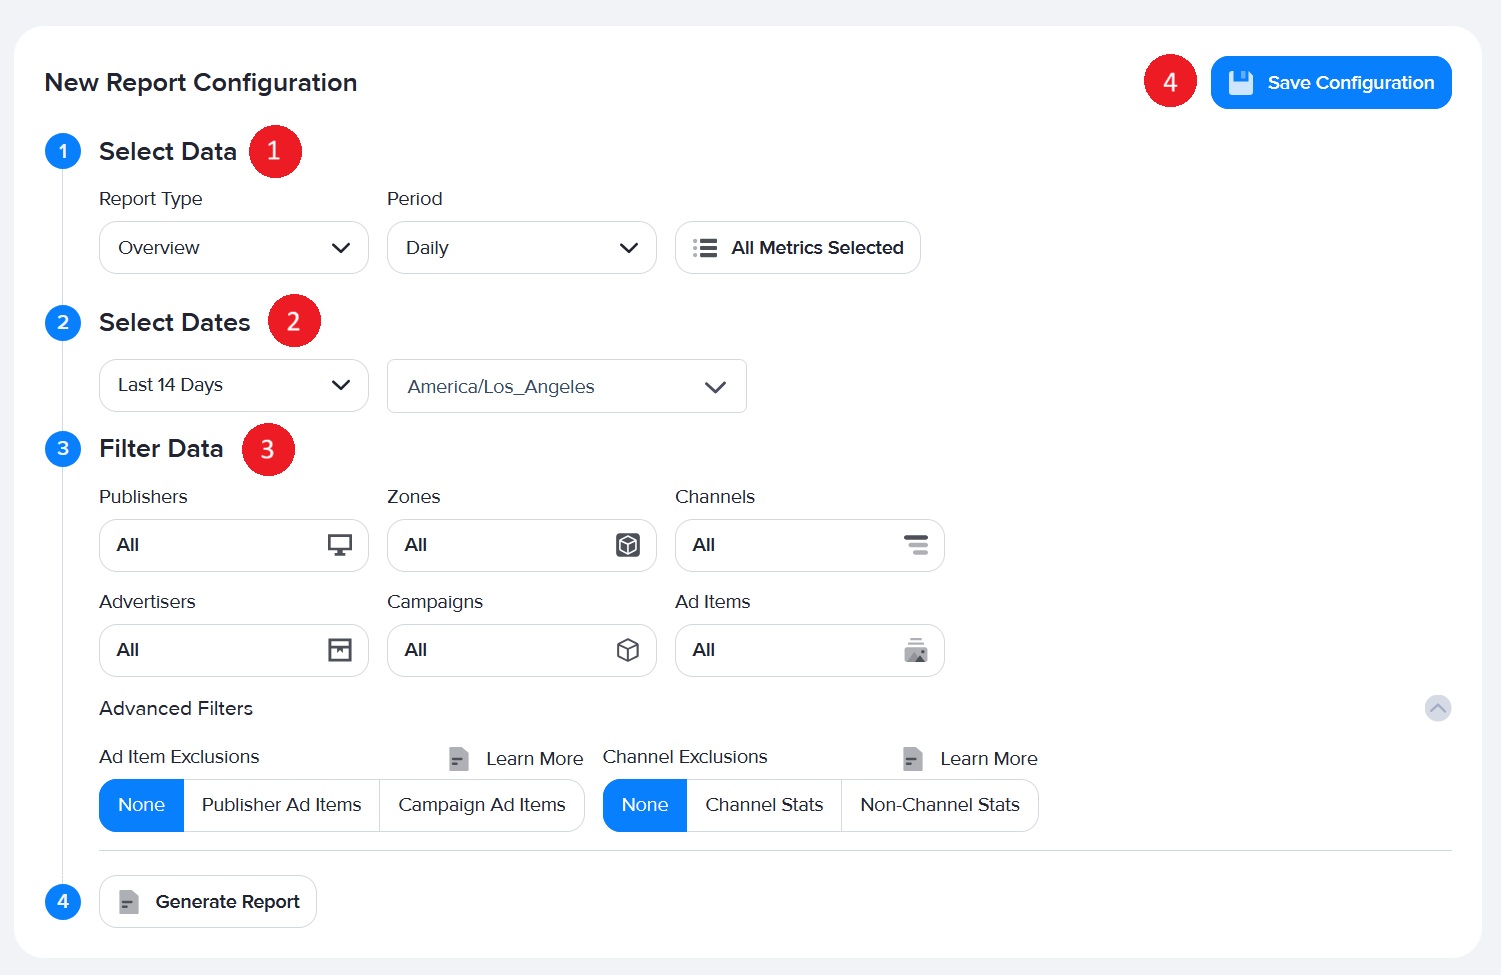
- Choose a name for your report then click Save.
Update a Report Configuration
- Open the report configuration you wish to change.
- Expand the configuration's setup section.
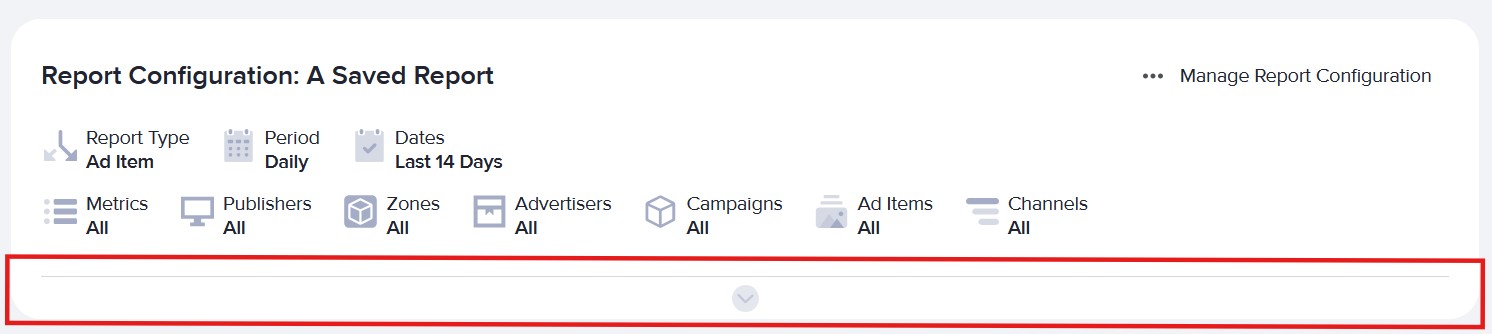
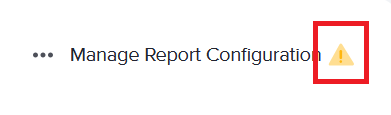
- Make the changes to the report configuration's setup. You should see a yellow triangular symbol beside Manage Report Configuration indicating that changes have been made.
- Click on Manage Report Configuration. In the menu that appears, clikc on Save Changes.
Schedule a Report Configuration
- Open the report configuration you wish to schedule.
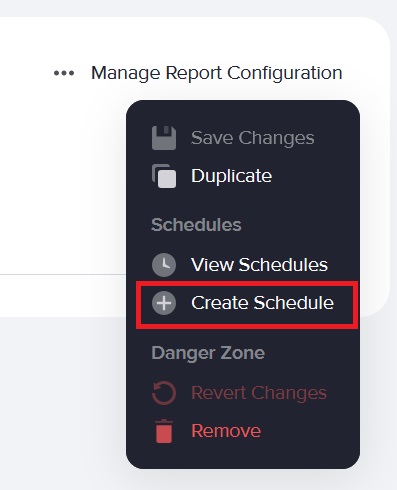
- Click on Manage Report Configuration.
- In the menu that appears, choose Create Schedule.
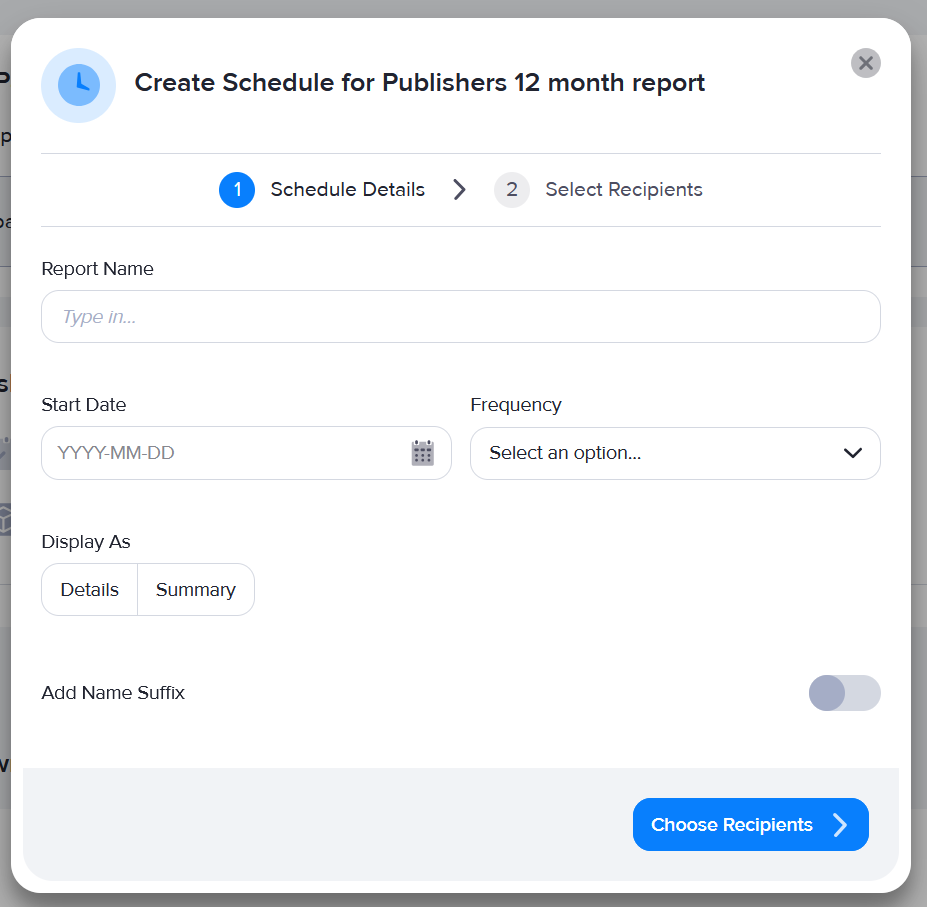
Fill out the data
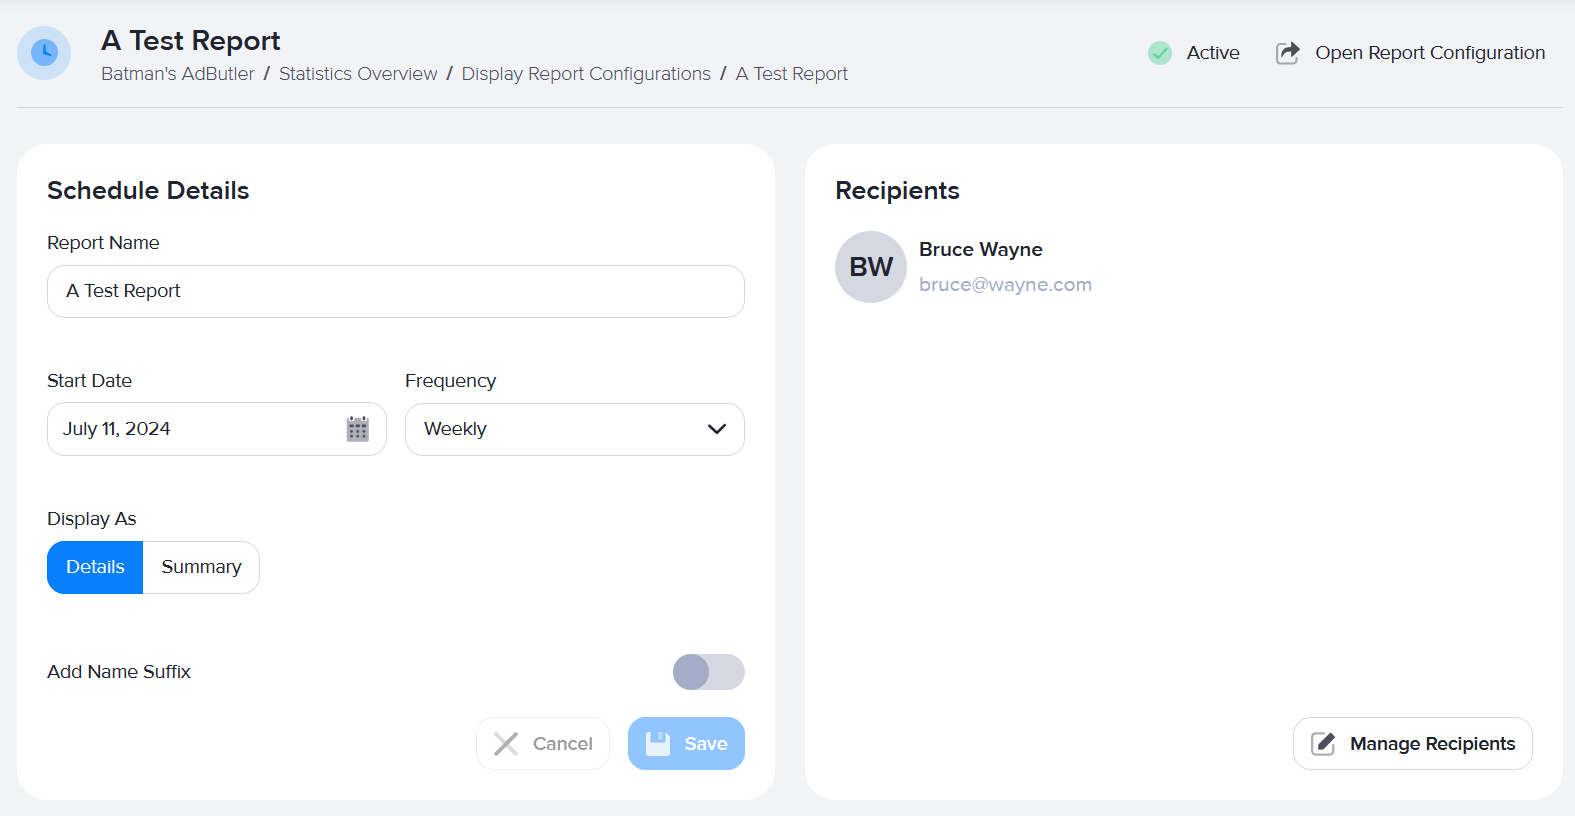
- Report Name: the name of the report that will be sent to the recipients. The report name will be the subject of the email.
- Start Date: the day this report will start sending. This cannot be a date in the past.
- Frequency: the frequency the report will be sent.
- Display As: the type of data that will be displayed to the recipients. You can see the difference in how the data is displayed by generating the report and choosing between the Details and Summary tabs.
- Add Name Suffix: choose information to be added to the end of the report name. This is optional, but can help better distinguish emails within inboxes.
Choose the recipients of the scheduled report. These recipients are loaded from your contact list, which can be found in the menu under Contact List. There must be at least one recipient, but multiple can also be chosen.
- Click Save Schedule.
View a Report Configuration’s Schedule
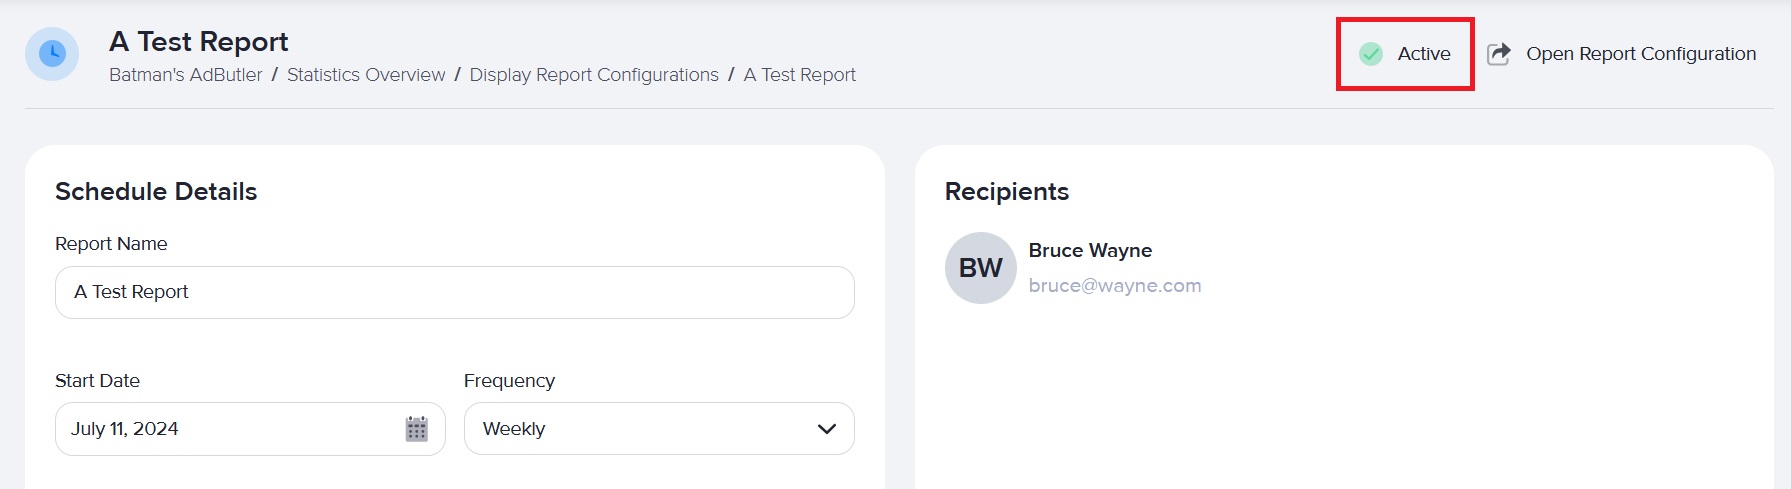
This page allows you to view the details of the report configuration’s schedule. It includes useful information such as a list of recipients, when the next report will be sent, and a history of all emails that have been sent for this schedule.
From the Report Configuration List page
- Click on the “…” menu on the right side of the table
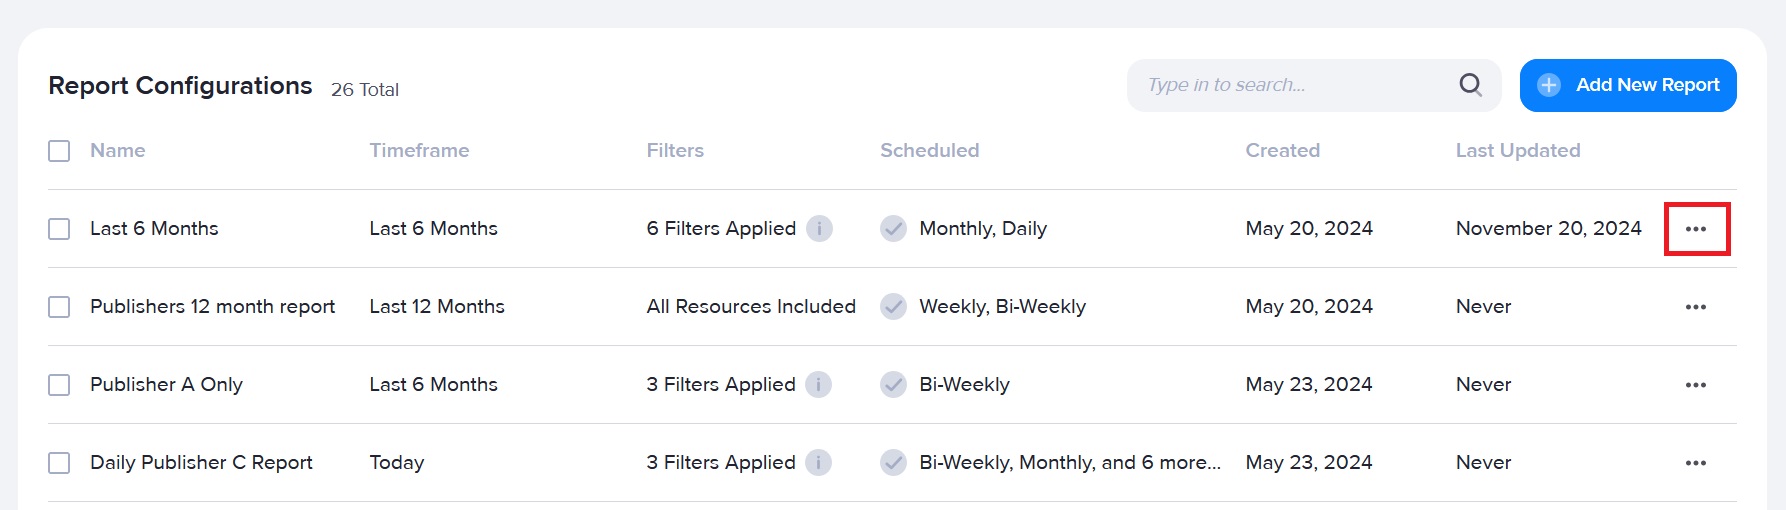
- Click on View Schedules.
- In the modal that pops up, click on the name of the report configuration schedule you wish to view.

From the Report Configuration View page
- Click Manage Report Configuration.
- Click on View Schedules.
- In the modal that pops up, click on the name of the report configuration schedule you wish to view.
Update a Report Configuration’s Schedule
To update a report configuration’s schedule, navigate to the report configuration view page. You can modify the data in the “Schedule Details” section of the page.
Updating Recipients
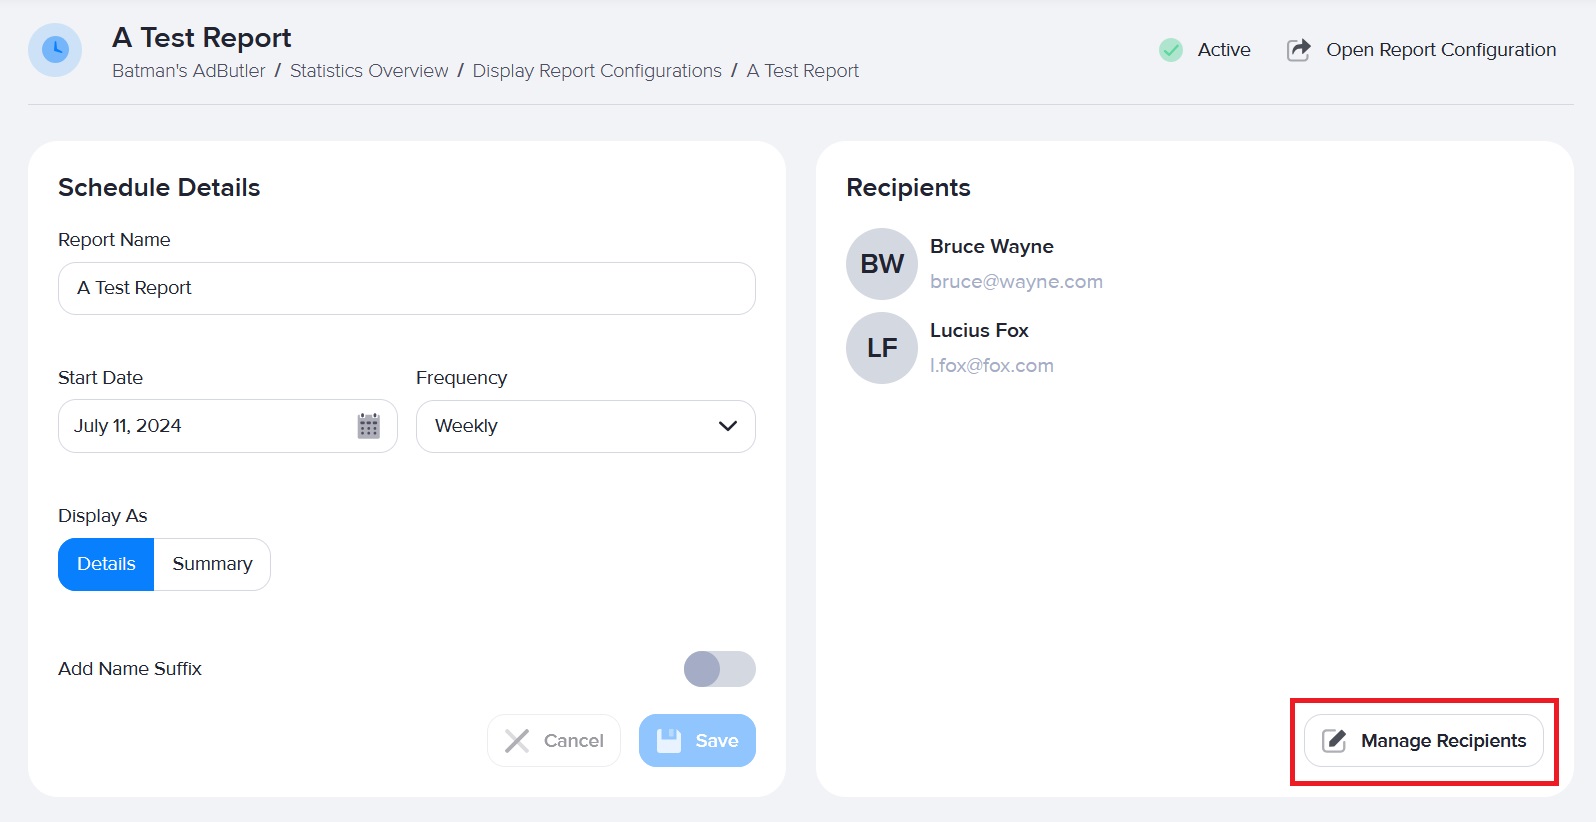
If you wish to update your recipients after the schedule has been created, click on Manage Recipients in the “Recipients” section of the page. This will allow you to add or remove recipients.
Adding a Recipient
Recipients added to the schedule gain access to any reports sent from the date you edit and onward. Adding recipients does not affect reports that have already been sent.
- Click on the Manage Recipients button
- Select the contact(s) you wish to add to the schedule
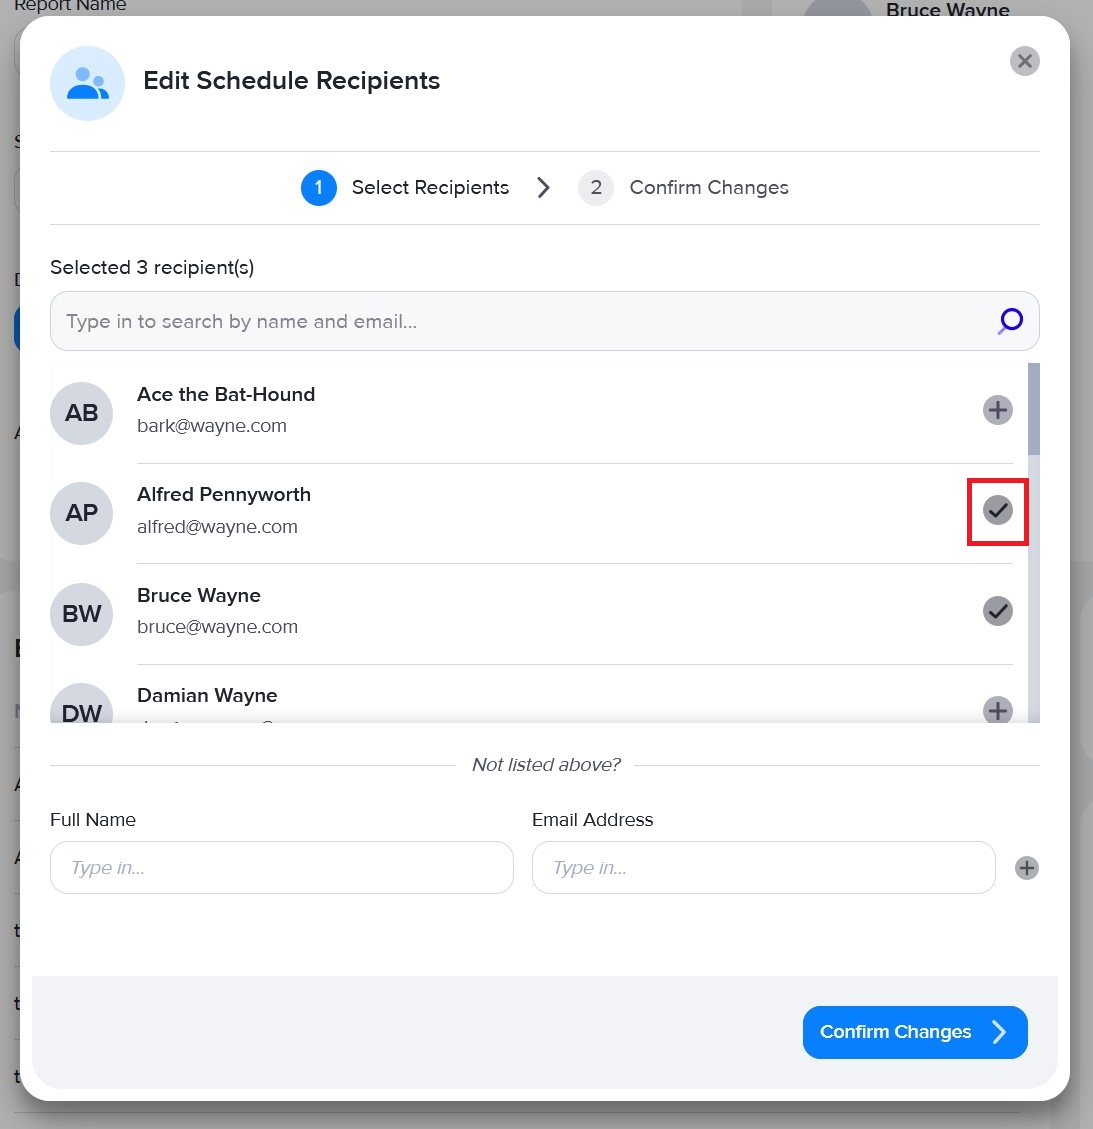
- Click Confirm Changes
- You will be asked to confirm your changes. Review the new contact(s) added in the "Added Recipients" section

- Click Save Changes to Recipients to apply the changes
Removing a Recipient
By default, recipients removed from the schedule lose access to any reports sent from the date you edit and onward.
To remove their access from all past reports, check the Remove Access to Existing Schedules option. This will remove access to any reports that have already been sent.
- Click on the Manage Recipients button
- Select the contact(s) you wish to remove to the schedule. Their icons should go from a checkmark to a "+".
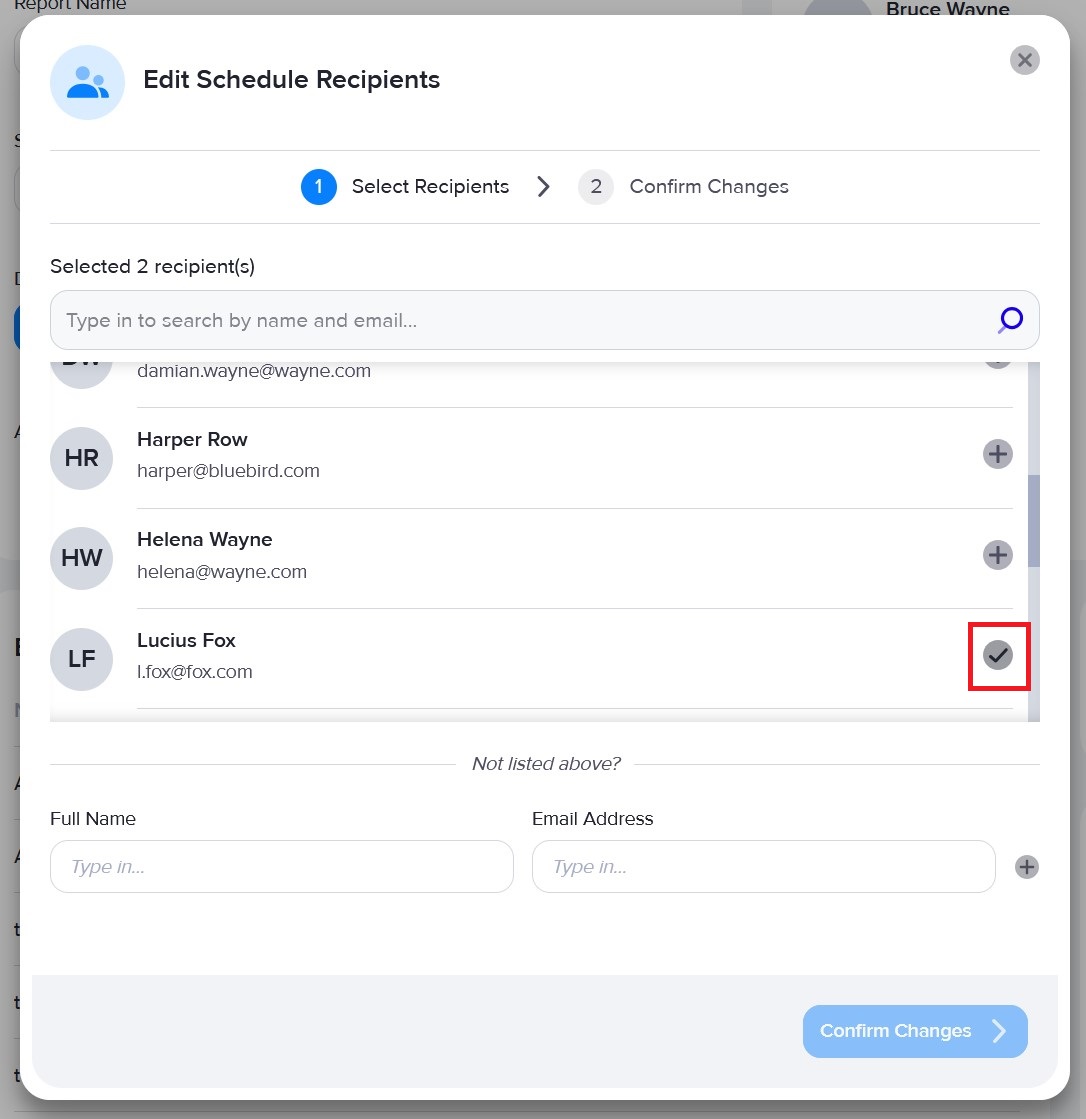
- Click Confirm Changes
- You will be asked to confirm your changes.
- Review the "Removed Recipients" section and confirm which contact(s) you wish to remove
- Decide if you wish to revoke this contact's access to schedules that have already been sent. This cannot be changed after removal.
- Click Save Changes to Recipients to apply the changes

Pause a Report Configuration’s Schedule
From the Report Configuration List page
- Click on the “…” menu on the right side of the table
- Click on View Schedules.
- In the modal that pops up, click on the “...” menu for the schedule you wish to pause
- Click Pause. If the schedule is currently paused, click Activate to resume report sending.
From the Report Configuration View page
- Click Manage Report Configuration.
- Click on View Schedules.
- In the modal that pops up, click on the “...” menu for the schedule you wish to pause
- Click Pause. If the schedule is currently paused, click Activate to resume report sending.
From the Report Configuration Schedule View page
In the top right corner of the page, the status of the report configuration schedule should be visible. Click on this status to toggle between the paused and active states.